
If there’s something I always make the effort to bake at Christmas, it’s gingerbread. Chewy, soft and deliciously spicy, they are perfect with a cup of tea or as a sweet treat after dinner. You can quite easily leave this … Continue reading
If there’s something I always make the effort to bake at Christmas, it’s gingerbread. Chewy, soft and deliciously spicy, they are perfect with a cup of tea or as a sweet treat after dinner. You can quite easily leave this … Continue reading
Am I the only one who avoids recipes that use an electric mixer because I can’t be bothered washing up?
It’s the height of laziness, I know. And as a result, pretty much all of the sweets I bake are mixmaster-free, except for special occasions.
I have no doubt that purists would argue the “melt-and-mix” variety of baking doesn’t produce a good crumb, or texture, or aeration. Or something like that. But you know what? I reckon most of my melt-and-mix cakes taste pretty damn good, and I’m hard to please.
So here’s one of them – easy chocolate cupcakes. They’re light but full of flavour, and can be served plain or jazzed up. And the best bit is that they’re made from pantry ingredients, take less than 20 minutes to prepare, and of course, all equipment is dish-washable!

Easy Chocolate Cupcakes, adapted from Cakes by Le Cordon Bleu
Ingredients
Method
This recipe makes 18 cupcakes. Feel free to jazz them up with some chocolate ganache, or carve a hole in the centre and fill with dulce de leche.

I honestly do not know where this year has gone. I feel as though I’ve spent a lot of time getting incredibly caught up in life and all of its challenges, while not really finding time to do the little things that I enjoy.
Although I haven’t been baking as much as I’d like in the past few months, I made some time recently to create a recipe for Oxfam’s rejigged Vegetarian Cookbook, which is now in its fifth edition.
I’m really quite honoured to be published in this book, alongside famous cooks and chefs such as Maggie Beer, Stephanie Alexander, Guy Grossi and Kylie Kwong.
But that’s not all. Sometimes it takes the little things to remind you that life isn’t so bad. And for me, that was slogging away in the kitchen on a warm night, getting a tiny bit (read: very) annoyed at myself and this recipe, before remembering the reason I was doing it. And that there are so many people out there who are much worse off than myself, and by doing something small, I can hopefully help out.
Below I’ve published my recipe for Chocolate Hazelnut Brownies, featuring Oxfam’s fair trade spread. And you know what? They turned out super chocolatey and fudgey, and pretty much as awesome as you’d expect a batch of brownies with a whole jar of hazelnut chocolate spread to come out. Please give them a go, and let me know what you think. And if you have the time, wander into your local Oxfam shop, or check them out online, and see what they’re up to and what you can do to give them your support. Even if it’s as small as buying a fairtrade jar of hazelnut spread.
Chocolate Hazelnut Brownies
Ingredients:
Method:

Is it just me or has Easter come around spectacularly fast? I’m sure it’s partially due to the early dates this year, but either way, the past three months seem to have flown by. I noticed this when I realised I hadn’t blogged since Christmas!
I’m one of those people who simultaneously complains about hot cross buns appearing in shops on Boxing Day, and secretly craves them. My solution this year (given the alternative was to buy very average buns from a supermarket) was to bake up a storm. I have a bit of an irrational fear of yeast; I’ve always much preferred baking from butter and eggs. My previous experiences with yeast have ranged from average to good, but I was willing to give it another try in the hope of hot cross buns fresh from the oven.
Despite a few issues with the yeast (which I almost expected), the buns turned out fantastic. They were nice and light with plenty of fruit and spice – a bland bun is dead to me! I honestly don’t think I’ve had a better hot cross bun, and this was my first batch!
So, the aforementioned yeast issues: I found that my first yeast mixture didn’t bubble, it just sat there. I could hear it quietly fizzing but nothing really seemed to be going on after 10 minutes. So I ended up leaving it and starting again, but this time with the milk slightly warmer. This did produce better results; I saw the foam start to accumulate on top much faster. Yeast is renowned for being sensitive, but I learnt that you do want the milk to feel warm as opposed to body temperature. You also don’t want the milk too hot which would kill the yeast. But please don’t let this put you off! Dried yeast is infinitely easier to work with than its fresh counterpart, and as long as you have foam your dough will turn out fine.
Onto the next issue: mixing. The first time I made these I decided to make them ‘the traditional way’ and shunned the electric mixer in favour of old fashioned hard work. I started to regret this decision 20 minutes later when my arms were aching and sticky dough was spread out all over the counter. I ended up adding extra flour to the original recipe (that’s modified below) which did help in making the dough less sticky, but the whole process was infinitely easier the second time I made the buns using a Kitchenaid. There was much less mess, and my muscles didn’t feel the pain! I will warn you, however, to make sure your electric mixer can cope with this quantity of sticky bread dough before you start. I also tried to make these buns in my Kenwood mixer, which started to emit steam from the motor after 10 minutes of mixing (it’s fair to say that was a bit of a disaster).
If you don’t have a mixer, or can’t use it, I would still urge you to give hot cross buns a go. Despite my complaints of sore muscles, the whole process really isn’t too bad, and in any case it is completely worth it for piping hot buns fresh from the oven.
Butter, anyone? Happy Easter!

Hot Cross Buns, adapted from taste.com.au
Ingredients
Method

My little brother hates chocolate.
Tears would ensue if you even attempted to offer him chocolate as a toddler. These days he isn’t quite as likely to throw a tantrum, but he still won’t be happy if a blob of brown ends up in his strawberry-vanilla portion of neapolitan icecream.
Personally, I – along with most people – can’t really imagine a world without chocolate. A day rarely goes past where I don’t nibble at a block in the pantry, or indulge in some icecream or brownies. Although my favourite way to indulge is Lindt couverture, I’m not particularly fussy – I love the sweetness of Easter eggs and white chocolate!
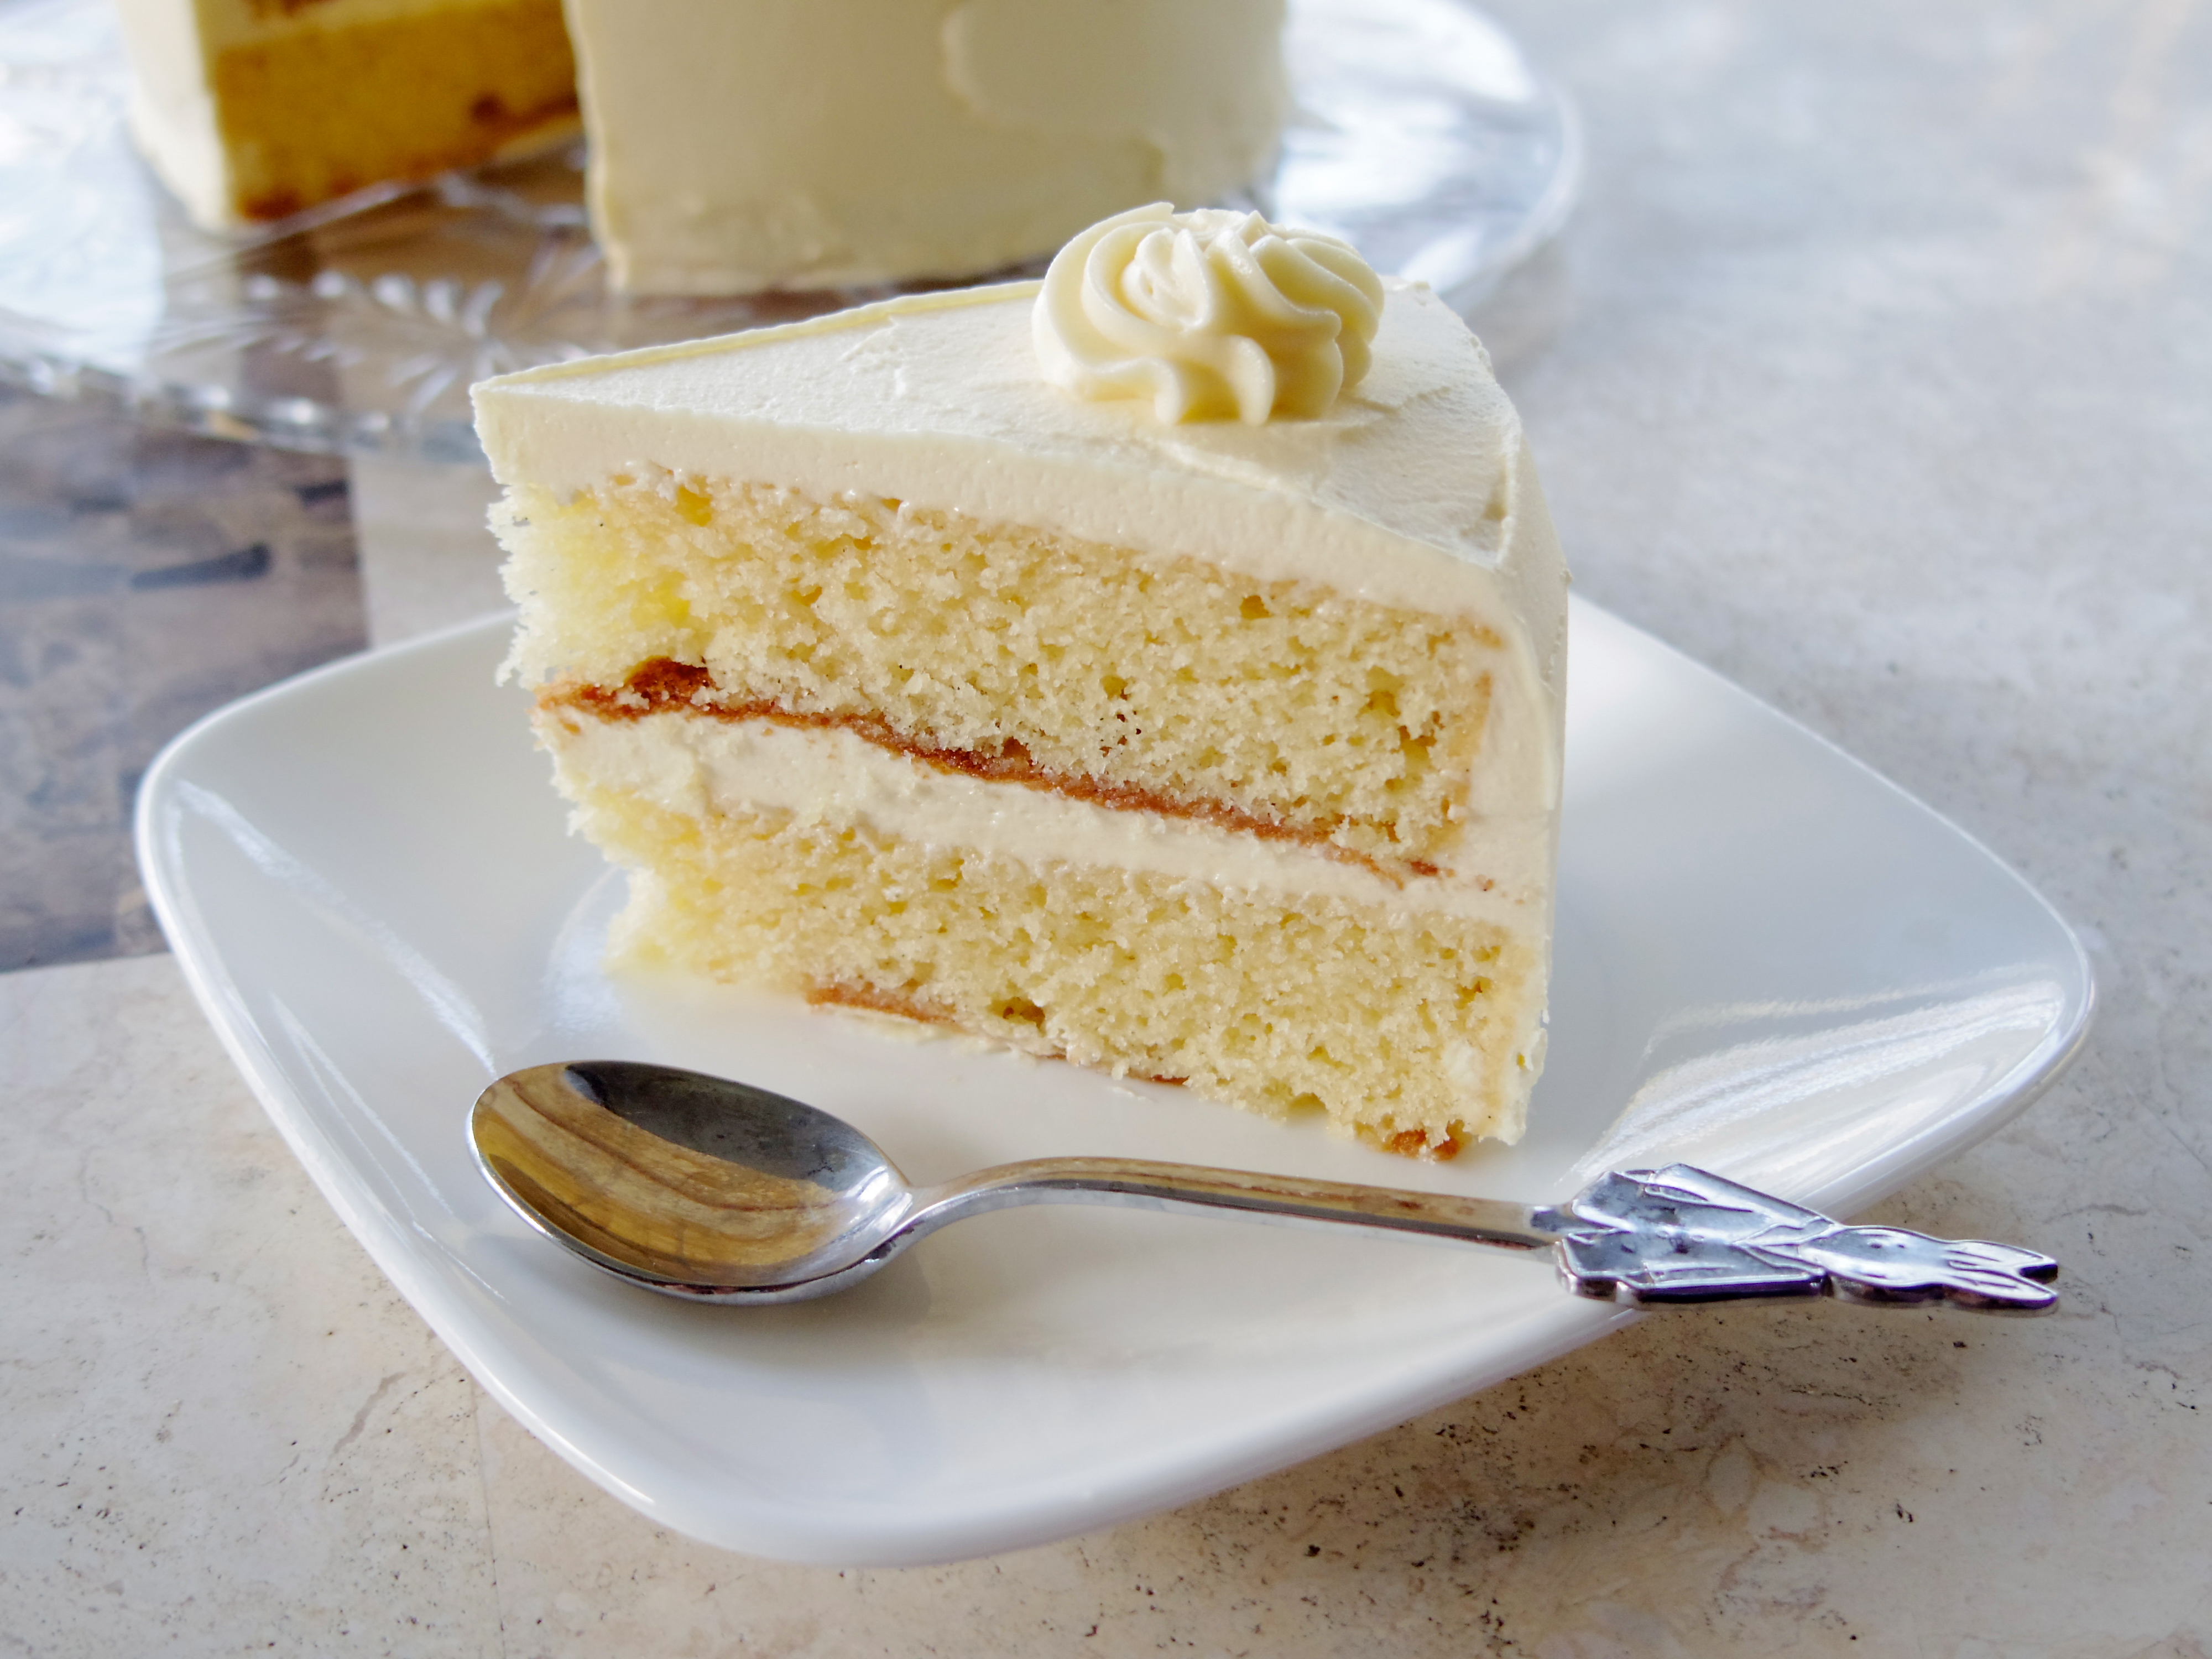
I love cooking with chocolate almost as much as I love eating it. But to keep it fair, I figure I should bake something without chocolate every now and then for the little one. Although this Very Vanilla Cake will no doubt be met with questions of “Is it white chocolate?” (try explaining to a six-year-old that white chocolate isn’t really chocolate), I’m sure it’ll be greatly appreciated by the biggest vanilla fan in the house, as well as the rest of the family!

I searched long and hard for a suitable vanilla cake recipe. I didn’t want something too dry or heavy, or worst of all, lacking in vanilla flavour. I had originally bookmarked Sweetapolita’s recipe for a Very Fluffy Vanilla Cake, but after reading the comments of various failures I chickened out a little. I generally don’t like using American baking recipes as, even with conversions, they never seem to work perfectly for me. In any case, I ended up using the vanilla buttercream recipe from Sweetapolita (though without vanilla beans), but sandwiched with a Peggy Porschen vanilla bean Victoria sponge soaked with a vanilla sugar syrup. I figured that would be vanilla-y enough!
The result? A lovely, moist layered vanilla cake, and probably the creamiest frosting I’ve ever had.
Very Vanilla Cake
Sponge adapted from Peggy Porschen’s Cake Chic, buttercream frosting adapted from Sweetapolita
Vanilla Victoria Sponge
Ingredients
Method
Fluffy Vanilla Buttercream
Ingredients
Method
Notes
When I was a little kid, we would always leave out a treat for Santa and his reindeer on Christmas Eve. Carrots would often be on the menu for Rudolph and his friends; someone must have decided at some point that reindeer have a diet similar to horses. As for Father Christmas, he would of course be treated to a couple of biscuits, usually of the Arnotts variety, and a glass of milk.
Although I’m sure my parents appreciated the midnight snack as they rushed to wrap presents and sign them off from Santa Claus, these days we pretend that Santa has slightly finer tastes. My younger siblings are given a special packet of “reindeer food” at school (rolled oats and glitter that will be found for days afterward) to scatter outside and Santa is usually left some homemade biscuits or a slice of cake.
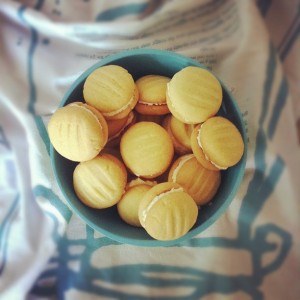
This year we’ll be treating Santa to a twist on the traditional shortbread: melting moments. Often found in cafes and restaurants, two shortbread biscuits sandwiched with a lemony filling are the perfect accompaniment to a cup of tea in the afternoon or a glass of milk at midnight. And best of all, they look impressive, taste much better than the bought variety but are deceptively easy! And I’m sure they will be greatly appreciated by someone on Christmas Eve this year…
Melting Moments, adapted from the Women’s Weekly Wicked cookbook and taste.com.au
Ingredients
For the biscuits:
For the filling:
Method

This post is part of the December Sweet Adventures blog hop! Check out all of the other fantastic posts here, and find out how to participate here.
“Have you been to Bar 9?”
I’ve been asked this question more times than I can remember, by foodies and casual diners alike. And my answer, sadly, was always ‘no’, unless you count grabbing a quick coffee from the original Bar 9 way back in 2010. The cafe has since moved across the road to premises about five times the size; the Bar 9 I went to a couple of years ago is now a distant memory for most!
When I visited, I can recall having a very good coffee, and noted they served goodies from Let Them Eat for lunch – that’s about it. These days Bar 9 boasts a full kitchen and thus a full brunch menu, as well as being known for serving some of the best coffee in Adelaide.
I finally made it to the “new” Bar 9 this week (though it’s not really new, having opened back in 2011). In fact, I liked it so much that I returned a few days later!
As I entered the cafe, I noticed it was fit out and decorated quite nicely. It still had the same hipster, put-together-at-the-last-minute-but-works-well kind of feel, though on a much larger scale than before. To put it simply, there is plenty to look at as you eat your meal. Aside from the cafe itself, it’s a great place to people-watch.

I considered ordering from the brunch menu but on both occasions I was in a bit of a rush so I opted for one of their piadinas, which I spied being freshly made in the kitchen. The chicken, mushroom and pesto piadina was spot on – piping hot and really flavoursome. Though pesto can sometimes overpower an entire dish, it was the perfect complement to the flavours on offer here. All of the ingredients were clearly fresh and good quality, as it’s hard to get something with such simple ingredients tasting so yummy otherwise! I also had a taste of the lamb piadina and salami piadina and thought they were equally tasty. The addition of rocket dressed in some kind of lemon infused oil provided a nice side salad as opposed to a boring garnish.The meals were huge too – I struggled to finish mine, and that’s saying something!

Lamb and pinenut piadina

Chicken, mushroom and pesto piadina
In terms of drinks, I’ve tried a latte, iced coffee, and a couple of their summer menu drinks – the magnum (shaken, sweetened espresso) and the ferrari (cafe freddo). I am in no way some kind of coffee expert, but you can tell Bar 9 know what they’re doing. That said – I found my latte perhaps a touch on the weak side. Only a touch. I suppose I do like my coffee stronger than most, so perhaps I would opt for a piccolo latte next time. The iced coffee was quite cute, as it was served in a jar (like a lot of things these days – this must be the new hip thing). It was a good size and the icecream was tasty, but it wasn’t too milky.
As for the slightly more fancy drinks, I enjoyed them but I’m not sure if I would get the same ones again. The cafe freddo was done well, but I was hoping for something slightly more refreshing. The shaken espresso, again, was a great concept but was just too sweet, in my opinion. The great taste was overshadowed by a massive sugar hit as you took a sip.

Iced coffee
Latte
So, after a couple of visits to Bar 9 – will I return again? Definitely! It’s clear this is a gem on this side of town – something a little bit different. They have something good going on, and I like it.
Bar 9: 96 Glen Osmond Rd, Parkside SA
Opening hours: Mon – Fri 7:30-4pm; Sat & Sun 8:30-2pm
![]()
Do you remember the boom of ‘4 Ingredient Cooking’ a couple of years ago? I never really understood all the hype, to be honest. Sure, there’s only four ingredients in your meal – but would it be better with five, or six? To me, an easy recipe has four steps, not four ingredients. I also figure that if you’re not putting much into your food, you’re probably not going to get a lot out of it. There are, of course, exceptions – you can definitely make a nice meal or snack with a few ingredients and some basics. But what makes these stand out is a good flavour combination and good quality ingredients, and in this respect, I don’t think a recipe book will always help you.
Perhaps the only true four ingredient recipe to which I turn regularly is one for scones. If you’re looking at a recipe for scones with more than 4 ingredients (excluding extras such as fruit), it’s probably unnecessarily complicated. Recipes for scones vary greatly but usually, their small ingredient list is common. I’ve seen recipes with milk, cream, lemonade, different flours, sugar, no sugar…the list goes on. The one that I use is probably the most basic (hence its title) but I don’t think it necessarily skimps on taste or texture. In the end, you generally don’t eat a plain scone on its own (pass the jam and cream, anyone?). Therefore you can get away with putting less in the scones themselves. Recipes that have cream, for instance, will probably be cakier, more flavoursome and buttery, but you’ll probably only notice this if you eat the scone by itself. Otherwise, in my opinion, a basic recipe is perfectly adequate.
I’ve heard lots of tips for making scones over the years, and a couple have stuck. The first one is to grate your butter instead of cubing it. This will make the rubbing process a lot quicker than if you’re dealing with cold, little cubes of butter that refuse to be rubbed into anything. While grating butter sounds a bit odd, I do find it helps. To make sure you get a fairly accurate measurement (though it doesn’t have to be exact), grate your butter directly into the bowl with the flour, and use kitchen scales to measure how much butter you’ve added. A box grater rather than a microplane works best.
The second is, as always, not to overwork the dough. You don’t really need to knead scone dough, or roll it out – a gentle pat is all that’s needed once the dough has come together. I remember being told in Year 8 Home Economics to give my scone dough 60 ‘turns’, or knead it 60 times. Of course I didn’t listen to this and ended up with the best scones in the class (and helped everyone else, too!).
Another thing to remember with scone dough is to more or less go with how it feels, rather than following the recipe to a T. The amount of milk absorbed by the flour will vary greatly, and so if you sense your dough will end up too dry as it’s coming together, act early and add some extra milk, though only a very small amount at a time. The dough will be a bit wet, but not excessively – you should be able to pat it out with floured hands.
Basic scones, adapted from taste.com.au
Ingredients
Method

I have a bit of a love-hate relationship with Donna Hay.
The love comes mainly from admiration – seriously, have you opened one of her cookbooks recently? The photos, the styling, the flavour combinations – if I’m ever feeling uninspired, it’s Donna to whom I turn.
However, despite the ‘fast, fresh, simple’ tagline, I can’t say I’ve ever found any of her recipes (particularly for baking) all that quick, or even simple. The flavours are simple, sure. But the recipes themselves can sometimes have too many or too few steps, and either require ridiculously expensive or difficult-to-find ingredients.
I remember my first cookbook was Donna Hay magazine’s annual kids issue – the first volume of it, in fact. I loved that thing. Even as a ten-year-old I would read it again and again, bake the same things again and again, and spend an unnecessary amount of time decorating cupcakes to perfection.
But what frustrated me, even back then, was the recipes and the ingredients. Often cakes would call for a mixture of plain flour, baking soda and baking powder – I’d say this is overkill for a magazine aimed at kids, when self-raising flour is readily available. Similarly, the recipes were often so simple as to not give enough direction. I could never recreate the pictures and it annoyed me, even though I now know that is quite a difficult thing to do, even for much more experienced cooks than me. Despite all this, and even after all these years, I still cook from Donna’s magazine, buy most of her new cookbooks, and flick through the pages when I’m bored.
So this brings me to what I baked today – an adaptation of Donna’s simple apple and blueberry cake from Fast, Fresh, Simple. It sounds easy, and the recipe makes it look easy, but to be honest I was disappointed with my results. Some of this probably comes from errors on my part – not softening the butter well enough, for example – and possibly oversights in the recipe itself. I’m always a bit doubtful of “chuck everything in the mixer” recipes, but they sometimes do work. Unfortunately, this isn’t one of those times.
I adapted the recipe slightly to suit the ingredients I had on hand, which wasn’t the issue. My first main problem was that my butter was not soft enough, so it didn’t blend into the cake batter properly, as there was no butter-sugar creaming step. This meant the cooked cake ended up tasting overly like butter, as the small chunks of butter melted into the cake – this sounds like it could be a good thing, but it wasn’t in this case. Imagine putting extra butter on top of a cooked cake – not nice.
My second issue was, as always, the cake looked absolutely nothing like the beautiful picture it was meant to. The cake rose around and above all of the fruit, so it didn’t look like a fruit cake at all. I don’t know what I could do to avoid this, apart from putting more fruit on top.
That said, I am more than willing to overlook an ugly cake if it tastes good. Unfortunately this one did just not stack up. Even with the supposedly easy one bowl, two step recipe, it still took a while to prepare with the chopping and cleaning, and all for not so good results, tastewise. That said, I might try this cake again, with super soft butter. I’ll post an update here when I do.
Apple and Strawberry Vanilla Cake, adapted from Donna Hay’s Fast, Fresh, Simple
Ingredients
Method

Chances are that if you’re reading this blog, you are a foodie in some shape or form. Perhaps you like checking out what’s happening on the cafe scene, or love buying the freshest local produce and cooking up a storm at home. Or, if you’re like me, you love both!
However, it took me quite a while to discover both the best places to eat and the best places to buy produce. Some might say it’s not difficult to find a good place to eat – there are entire blogs and websites dedicated to rating and reviewing restaurants and cafes. But buying the best stuff to make and cook at home? I think that’s more difficult. It often requires a bit of extra effort to find fresh food, but you’ll be thanking yourself when you taste the difference between real produce and what you buy at your local Colesworths.
So here is my list of places to shop in Adelaide for the average foodie. This list is by no means extensive; it’s just where I generally go to stock up. Let me know in the comments section if there’s anywhere else I should be visiting!
Queen Street Grocer
Queen Street Grocer is located conveniently next door to Red Door Bakery, perhaps my favourite place in the world. After eating my fill of sausage rolls and croissants, I’ll often sneak next door and top up on pantry essentials. My weekly purchases always include muesli – QSG stock the Goodies and Grains toasted varieties, some untoasted/bircher mixes, as well as my absolute favourite, the maple nut crunch. This crunchy muesli isn’t always in stock, so when it’s available I tend to hoard it and buy half the batch (sorry, guys!). It’s a tad more expensive but in my opinion completely worth it. On a weekend I like to poach pears in honey syrup, cinnamon and star anise, and serve these with muesli, natural yoghurt and some fresh fruit. This is an amazing gourmet breakfast at home, and a lot cheaper than eating it out, too.
This brings me to my other purchases. QSG sell little glass jars of herbs and spices for $3, and will refill your jar for $2. This is pretty much the best value ever, not to mention you’re getting much better quality than your standard packet from the supermarket. They also have a great variety of nuts, dried fruits and grains, as well as showcasing SA produce.
Adelaide Showground Farmers Market
Who doesn’t go to the farmers market these days? I started making the trek regularly a couple of years ago and since then it has really boomed. There’s people everywhere and the lines are ridiculously long at the more popular stalls. If you dislike crowds you can go in the afternoon, but the best picks are always gone by 11am. Don’t let this stop you though! The atmosphere at the market is great, with such a variety of patrons, buskers, and of course the stallholders. I can’t really explain in words the joy I get out of the market; it’s more than just buying really good quality produce. It might just have something to do with the friendliness of the stallholders and the feeling you get from knowing you’re supporting our state’s deserving farmers rather than the profit margins of the supermarket duopoly.
I like to buy huge bags of red capsicums to roast from the Tsmikilis family at their corner stall – for about $5 you can get 1.5kg of slightly blemished capsicums which are much better than your average supermarket fare. I usually purchase my apples from Otherwood Orchards – I have never bought a floury apple from them, and that’s saying something. Head to the Honey Lady inside if you want the best honey you have ever tasted – she has a huge variety of raw and spiced honeys. My personal favourite is the cinnamon honey, which is great with black tea before bed. For a special treat, buy a box of toffee from Dickens Delights. I don’t know how it’s made but it tastes amazing. My family has been known to buy a box and finish it off that night. I also have a bit of a soft spot for Paolo’s fruit buns; they were originally sold as hot cross buns, and since they were so popular he continued baking them! I wish other bakeries did this sometimes, but I know I’d (eventually) get sick of them. If you need another special treat, head to From Scratch Patisserie. You may have seen their popup stall near Coffee Branch on Friday mornings – it is pretty much just a stall of yum. The pastries and macarons are to die for, and you can tell that a lot of thought has been put into what they create.
I could probably write an entire blog post on the Farmers Market, but I’ll just end on this: there is a perception that the market is more expensive, or for the hardcore foodies, but I’d have to say this is completely incorrect, in my opinion. If you want to search out the heirloom vegies, the tastiest fruit, and buy the best from primary producers, there is nowhere better to do it than here. You’re supporting the farmer directly and providing a direct source of income. Because there is no middleman, the prices are often similar to that at your local greengrocer or supermarket, though may sometimes be cheaper or more expensive depending on the seasons and availability. You won’t find strawberries or bananas in the middle of winter at the farmers market, and this is for a good reason. I think cooking good food comes from buying seasonally, and this is easiest to do at the farmers market.
Adelaide Central Market
The Adelaide Central Market is slightly more accessible than the farmers market, and also has a wider range, as it’s not limited to local production (see here for the differences). It is open most days and with such good competition in the market, prices are often quite good. There is everything from average to the best quality in the central market – the trick is to take the time to search out what’s best. Every stall is going to have something to offer.
Apart from your basic fruit and veg, you can pretty much purchase anything else you desire from the market. A recent new stall is San Jose smallgoods, who also pop up at the farmers market on the weekend. Their amazing chorizo is the perfect touch to spice up a risotto.
The other bonus about the central market is that with the surrounding restaurants and cafes, not to mention Rundle Mall down the road, you can easily make a day of your shopping trip.
Bottega Rotolo
I don’t come here often, but when I do it’s for something quite specific. Bottego Rotolo are located in Norwood, quite close to the city. I like to think of them as Adelaide’s Essential Ingredient. If you want something that’s quite hard to find, chances are you’ll find it here. Think vanilla pods, fancy imported cheeses and very expensive balsamic vinegar.
Tony & Marks
Tony & Marks, on the other hand, is at least a weekly stop-off for my family. It’s more than just your average greengrocer – we buy Tweedvale milk, cheese, olives, yoghurt and Careme pastry here, as well as fruit and veg and the occasional bunch of flowers. The prices are also excellent too – for example, cheddar cheese is $10 per kilo, as opposed to the $20 per kilo imported varieties at the supermarket.
Standoms
Around the corner from Tony & Marks is Standoms Butchers, though they are of course located all over Adelaide. After purchasing meat and smallgoods from Standoms for so long, it’s difficult to eat meat from the supermarket, I actually can’t stomach it. You can just tell their meat is always fresh, and when you buy ham from Standoms, it actually tastes like ham rather than plastic (I like the schwartzwelder personally).
Red Door
I may have dedicated a whole blog post to Red Door, but it’s worth mentioning again that in terms of weekly supplies, they have the best bread, ever.
Goodies and Grains
Located in one of the arcades off the Central Market, Goodies and Grains is a bit like your supersize Queen Street Grocer. They sell everything loose, from tea to nuts and dried fruits, dried beans and pasta, a huge range of herbs and spices, ten different types of flour and five varieties of rolled oats (that may be an exaggeration but you get the idea). The best thing about being able to buy in this way is that you can purchase only exactly how much you need, which means that you get everything super fresh and it’s also cost effective. There’s no need to buy a huge jar of sumac if you only need a teaspoon. They also give you a discount if you bring your own jars or containers to put your purchases in, so this might be worth considering if you plan to buy a lot. Goodies and Grains is definitely worth checking out if you’re health-conscious or have food intolerances as they have a wide range of ingredients to cater for this.
So that brings me to the end of the list. I’m sure I’ve missed out places, and I have definitely not done each store or market justice in a few paragraphs or less. That said, there’s only so much I can say without rambling – the best thing to do would be to visit yourself 🙂
![]()
